The Basics of Gluten-Free Sourdough
Embarking on the journey of gluten-free sourdough baking is like opening the door to a treasure chest for those with gluten sensitivities—every loaf is a golden piece of joy. Unlike the well-trodden path of traditional wheat-based sourdough, the gluten-free version prizes a different set of secrets to create that perfect airy crumb and crusty exterior we all crave. But fear not, for the quest is as delightful as the reward.
At the heart of gluten-free sourdough is the magical concoction that flour and water become when left to mingle and ferment: your sourdough starter. This bubbling brew is the life-force of your bread, harnessing wild yeasts and beneficial bacteria that work tirelessly to leaven your dough and build flavor complexity that’s simply out-of-this-world. Every loaf tells the story of your starter’s journey, making each crumb an intimate affair.
Your sourdough starter is akin to a mythical creature that needs your care and attention. Feeding it a diet of gluten-free flours not only keeps it alive but also determines the character of your bread—each flour adding its unique personality to the mix. From the robust earthiness of buckwheat to the subtle sweetness of rice flour, your choice of flour blend is the palette from which you’ll paint your sourdough masterpiece.
But it is not just about aesthetics. Gluten-free sourdough brings a bounty of benefits to the table. The fermentation process predigests the flours, making them easier on your belly and often enhancing the nutritional profile with B vitamins, iron, and probiotics—little helpers that promote a happy gut. And let’s not forget the sheer bliss of indulging in freshly baked bread that’s friendly to your dietary needs!
To start your adventure, you’ll need to create the elixir of life for your bread— the sourdough starter. In a clean jar, mix together equal parts of gluten-free flour and water. A simple combination like brown rice flour and water works wonders to begin with. Stir till you reach a thick, yet pourable consistency, and let the jar sit with its cover just resting on top— allowing it to breathe in those wild, natural yeasts. This mixture will be the cornerstone of your bread, and over the next several days, you’ll watch as it transforms, indicating it is time to bake.
Remember, gluten-free sourdough is a craft that flourishes with patience and practice. Your first few attempts may be less Paul Hollywood and more Paul Bunyan, but don’t let that dampen your spirits. Every mix, every fold, and every bake brings you closer to the loaf of your dreams. With each slice, you’ll feel the triumph of creating something beautiful, wholesome, and kind to your body. And that, fellow gluten-free warrior, is the true joy of baking gluten-free sourdough.
Choosing the Right Gluten-Free Flours
Now that we’ve dipped our toes into the basics of gluten-free sourdough, let’s wade a little deeper into the floury waters and suss out how to select the best gluten-free flours for your baking adventure. The right combination of flours isn’t just about replicating the taste and texture of traditional bread; it is an alchemy that will ensure your loaf rises to the occasion—literally!
When crafting your very own blend, consider of yourself as an artist with a palate of flavors and textures at your fingertips. White rice flour is a trusty sidekick, lending a mild flavor and light texture. Brown rice flour, with its nuttier tones, packs more nutrients and gives your bread a hearty character.
One of the great challenges of gluten-free baking is achieving the springy structure that gluten so magnanimously provides in wheat bread. That is where our little helpers, xanthan gum and guar gum, come into play. These are not flours but binding agents—you’ll need them to mimic gluten’s structural prowess. A pinch of either can help your dough rise with dignity, but be warned: too much can lead to a gummy fate. Use sparingly for the best results.
For a bread with robust flavor and rustic allure, try adding buckwheat flour to your mix. Despite its name, buckwheat isn’t related to wheat at all—it’s a plant related to rhubarb! Its earthy undertones will make your bread sing with depth and complexity.
But let’s not forget a calorie-free ingredient that’s absolutely crucial for the success of your gluten-free sourdough: patience. Unlike its gluten-full counterpart, your gluten-free dough will be stickier and more delicate, so handle it with care and gentle hands. It’s not just about following a recipe—it’s about the feel of the dough, the warmth of your kitchen, and the love you knead into every inch.
Ready to get your hands dusty with flour? Here’s a tried-and-true recipe for a gluten-free sourdough loaf that will make your taste buds do a happy dance:
- 1 cup gluten-free sourdough starter
- 2 cups brown rice flour
- 1 cup white rice flour
- 1/2 cup buckwheat flour
- 1 tablespoon psyllium husk powder (a natural binder to replace xanthan or guar gum)
- 1 teaspoon sea salt
- 1 1/2 cups warm water
In a large bowl, whisk together the brown rice flour, white rice flour, buckwheat flour, psyllium husk, and sea salt. Add the gluten-free sourdough starter and warm water. Combine all ingredients using a wooden spoon until you have a sticky, well-integrated dough.
Transfer the dough into a parchment-lined loaf pan, cover it loosely with a damp towel, and set it aside in a warm place. Allow the dough to rise for 6-12 hours, depending on your room temperature and the vigor of your starter. The dough is ready when it has almost doubled in size and shows small bubbles on the surface.
Preheat your oven to 450 degrees Fahrenheit (232 degrees Celsius). Place a tray of water at the bottom of the oven to create steam. Bake your loaf for 50-60 minutes, or until the crust is golden-brown and a thermometer inserted into the center reads 210 degrees Fahrenheit (99 degrees Celsius).
Remember, every flour brings a nuance, every rise contributes to texture, and every bake locks in the flavors. The key to great gluten-free sourdough bread is about embracing the process, enjoying the creation, and, ultimately, devouring the delicious results. Your gut will thank you, and your taste buds will beg for more.
The Sourdough Starter: Cultivation and Maintenance
Maintaining a gluten-free sourdough starter requires attentiveness akin to tending a delicate garden. At this point in your sourdough journey, you’ve guided your starter through its infancy, marveling each day as it has bubbled and grown. With your starter now alive and active, it’s crucial to establish a feeding routine to keep it healthy, vibrant, and ready to lift your bread to new heights.
Think of your starter as a pet that’s always hungry, needing regular meals to thrive. You’ll want to feed your starter with equal parts of gluten-free flour and water at least once a day if you are keeping it on the counter or once a week if refrigerated. The key is consistency; your starter loves a regular schedule. A happy starter means more predictable results in your bread, and that’s the kind of reliability you crave in your baking adventures.
To feed your starter, discard about half of your existing mixture—trust me, it is necessary to avoid ending up with a sourdough starter the size of a small car! Then, replenish with fresh flour and water. If you began with brown rice flour and want to mix things up, feel free to experiment with other gluten-free flours. Each flour will impart its unique flavor and nuances to your sourdough, so that you can become the conductor of an orchestral ensemble of taste profiles.
But what if your starter seems a bit sluggish or has a layer of hooch, that alcoholic liquid that can accumulate on top? Simply pour off the hooch, give your starter a hearty feeding, and keep it somewhere warm. This usually does the trick to reawaken its bubbling vigor. And if you detect any off-putting odors or see signs of mold, it’s best to start over. Safety first!
Maintenance is not just about feeding; it is also about understanding how temperature and environment can affect your starter’s mood. Colder climates can slow down your starter, so you might consider finding a cozy nook in your kitchen or even using a proofing box. On the flip side, if your home is warm, your starter may become ravenous, requiring more frequent feedings. Pay attention to these details, and you’ll be rewarded with a robust and enthusiastic culture that’s eager to transform your gluten-free dough into bread that is full of life.
For those of you with wanderlust in your hearts, fret not about neglecting your starter. You can put it in the refrigerator for a slower metabolism, feed it only once a week, and bring it back to room temperature to revive its energy when you return.
And now for a little secret: if your starter is mature and you’re baking regularly, try saving a scoop of dough from your current batch to kickstart your next. This little bit of leftover dough is rich in the microorganisms that contribute to the distinct flavor and texture of your bread, ensuring a legacy of flavor is carried on.
Whether your bread-making ritual is daily or weekly, remember that your sourdough starter’s performance is a reflection of the care you give it. Your patience and devotion will be handsomely rewarded—not just with the bread it produces, but also with the satisfaction of having nurtured something truly special from the simplest of ingredients.
Baking and Troubleshooting Gluten-Free Sourdough Bread
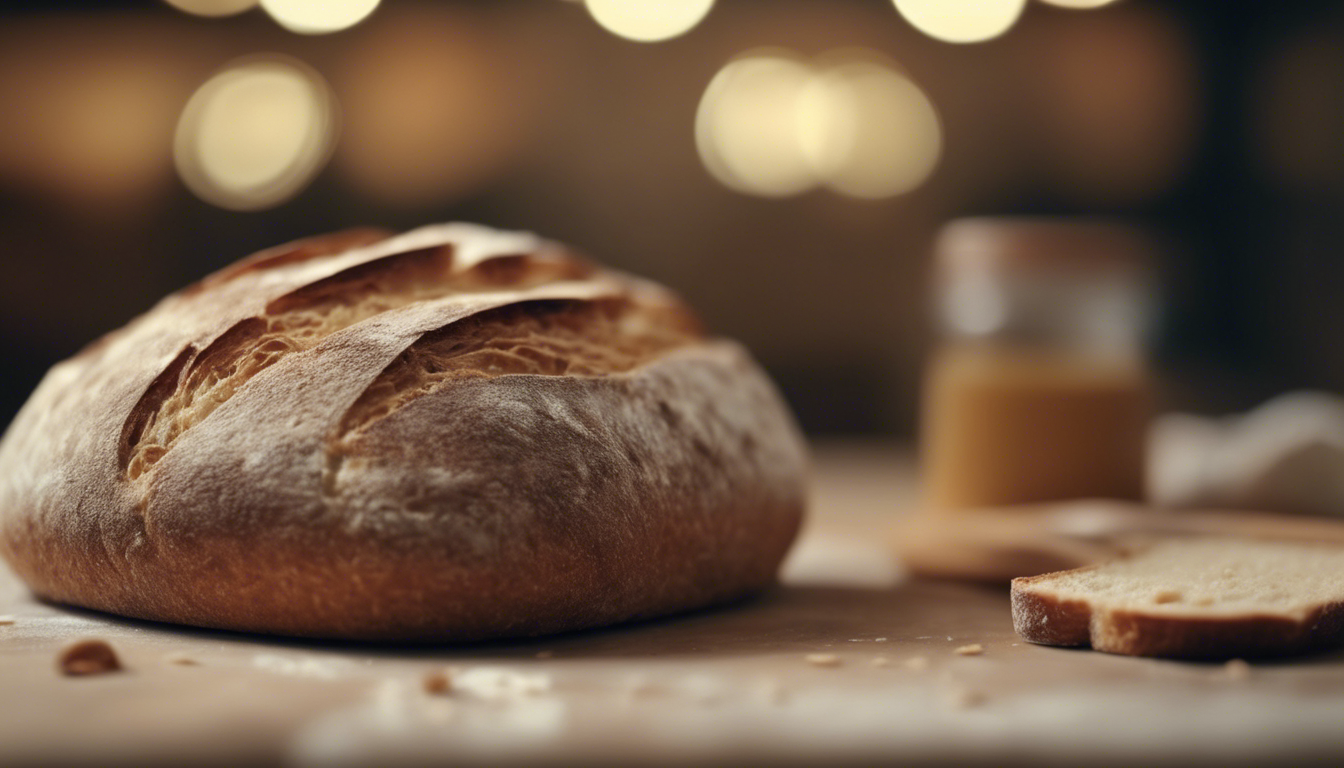
Alright, let’s preheat that oven and roll up our sleeves – it is baking day! Finally, the alchemy of gluten-free sourdough will come to life. Before you start, ensure your dough has risen to its full glory, teasing you with those little air pockets on the surface. Feel the anticipation build as you score that loaf, giving it that final personal touch before it bakes into golden perfection.
The character of every sourdough is revealed in the oven’s heat, and your job is to set the stage for its best performance. Slide that loaf pan into the oven, which should be roaring at 450 degrees Fahrenheit to welcome the dough with a warm embrace. Watch the magic unfold as your bread transforms, the crust crisping into a delightful shade of brown as it bakes.
About 45 minutes in, that aroma, oh that aroma—the one that sings through your home and makes your stomach do somersaults—it tells you we’re almost there. Take a peek, and if you see your bread blushing with a tempting tan, you’ve hit the jackpot! If you’re uncertain, a quick temperature check should show a hot 210 degrees Fahrenheit heart at the center, meaning your bread is baked through.
But, let’s address the elephant in the room: sometimes things go awry. Perhaps you find your bread struggling to rise, donning a pale complexion, or worse, the dreaded gummy texture. Fear not, for every problem has a solution! Not rising? That could mean your starter wasn’t quite ready to perform, or perhaps the kitchen was a tad too chilly during the rise. Aim for a warm, draft-free spot next time or give your starter a few more feedings.
If your crust isn’t achieving that delicious golden hue, try leaving the loaf in the oven for a bit longer, or perhaps increase the initial oven temperature. But remember, don’t judge a loaf by its color alone—temperature tells the true tale.
And that gummy middle can be the bane of gluten-free bakers everywhere. The solution often lies in the bake – a longer bake time at a lower temperature can help dry out that stubborn stickiness. Sometimes, the culprit is too much water in the dough, so adjust your hydration levels next time.
In the end, baking gluten-free sourdough is akin to a passionate dance with flour, water, and heat—sometimes smooth, sometimes stepping on toes, but always worth the effort. Learn from each loaf, and remember, each attempt will bring you closer to that airy, tangy slice of heaven. When the journey is laden with such aromatic, delectable rewards, it’s clear: gluten-free sourdough bread is not just a craft, it’s a labor of love and a feast for the senses.
So gather ’round the kitchen, grab that serrated knife, and as you break bread with friends and family, know that you’ve mastered not just a recipe, but the art of patience, resilience, and pure joy. Each bite is proof of your journey, your care, and your triumph over gluten-free challenges. Here’s to many journeys ahead, dear baker, with many more loaves to come!